|
|
|
Cusco Bushing Installation
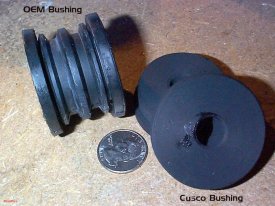
The Cusco bushing
modification is highly recommend buy owner who have had
this mod done. A must for anyone who want smooth solid shifting from 1st to
2nd during high RPM's. With stock bushings during higher RPM's when shifting
into 2nd it seem that it does not seem to want to shift immediately. Once
this the new bushing are installed the shifting will feel more smooth and
crisp like a true sports car shifter. Bang for buck is very high at only
around $60 for the Cusco bushings and 20-30 mins install time.
Author : Peat R. Jr. Photos : Peat R. Jr
Tools needed: |
Parts
needs:
|
Approx. Time needed:
|
Special note:
Eyeprotection is recommended to keep dirt from the undercarriage out of your
eyes.
Your arm will be touching the exhaust piping. So, it will have to be cool.
If not add 1st aid burn cream to the tool list.
Author's Disclaimer:
Disclaimer, I'm not responsible if you drop the car on your head or get
something in your eye. Please work safely. YMMV and all that stuff.
Let's go!
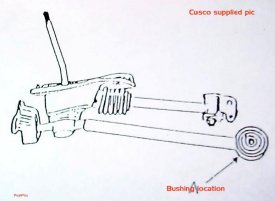
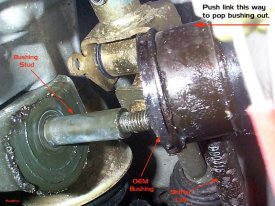
1) Jack it up and find the bushing...
|
 |
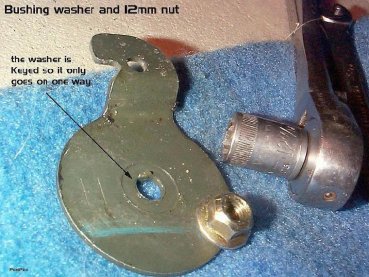 |
2) Remove nut and washer... Take a 12mm open end and remove the nut and washer plate. The washer plate is keyed so it will only go on one way but make sure you have that little bent tab in the right direction when you put it back on. |
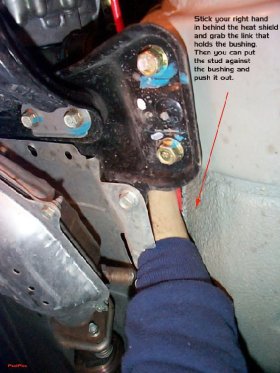
3) Pull bushing off of the stud..
|
 |
|
I found it came out easily if you hold the link and position the bushing so the stud is close to the edge of the bushing. Push hard towards the center of the car and you can pop it out.
|
 |
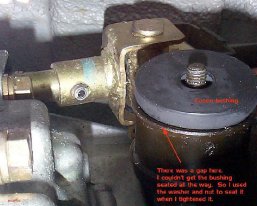 |
4) Put the Cusco bushings in...
|
Many thanx to Peat for writing and providing pic of the install. Top quality job, Peat!!
Peat's Impreza profile:
99' Subaru Impreza RS 2.5 -
Silverthorn MT
Strömung muffler, No intake Silencer, K&N panel
Hella air horns, trunk light, PIAA Ion Fogs, V1
Kartboy Short Shifter w/ Cusco bushings, De-badged
97' Subaru OB Limited - Rio Red AT
PIAA 4060 fogs, Twin FAIMMs


|
|